Do you want to know, how to install and set up Yoast SEO plugin for WordPress?
Yoast SEO plugin is the best WordPress plugin and offers a different set of tools to optimize the website.
The newcomers find it difficult to set up the Yoast SEO in a proper way in WordPress. In this blog, we will go through the complete Yoast SEO plugin set up that boost your website.
Before walk through the setup Yoast SEO plugin, we should know the features of it and why it is so important in the WordPress world.
Features of Yoast SEO plugin for WordPress
- Change the post’s title and description on per post basis.
- Focus keyword
- Configuration of meta robots like follow, nofollow, noodp, noindex
- Canonicalization on each post and page
- Permalink cleanups
- configurable breadcrumbs
- XML sitemap
- .htaccess and robots.txt editor
- Ability to verify Google Search Console, Bing Webmaster Tools
- A redirect option that helps redirect the page from one to another page.
- Use multiple focus keywords
- Internal linking suggestions
- Free video tutorial for each feature of SEO plugin
Now, start to understand how to set up the Yoast SEO plugin for WordPress
First thing, you have to do is to install the Yoast SEO plugin and activate it. After installation, you will notice a new item in the left sidebar with Yoast SEO logo on it. You have installed and activate the Yoast SEO plugin for WordPress.
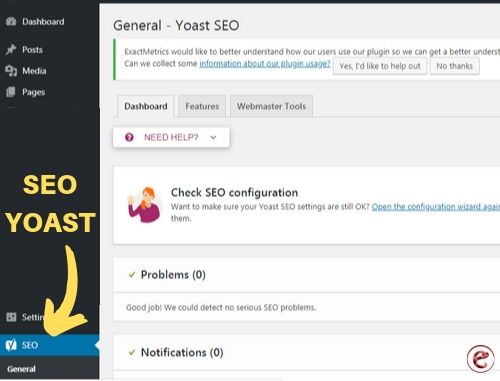
Now, it’s time to configure the setting of Yoast SEO.
1. General setting
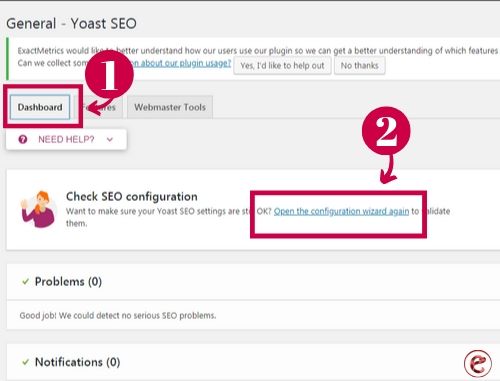
Hit on the SEO icon, you will get a dropdown menu with general setting, search appearance, search console, social. Click on the general setting, and there you will notice a configuration wizard.
Click on the feature
There are lots of features in Yoast SEO. you only need to turn those features on and off according to your choice. By default, all the features of this page are turned on. Keep its turn on. And also know the meaning of the terms that are used in it.
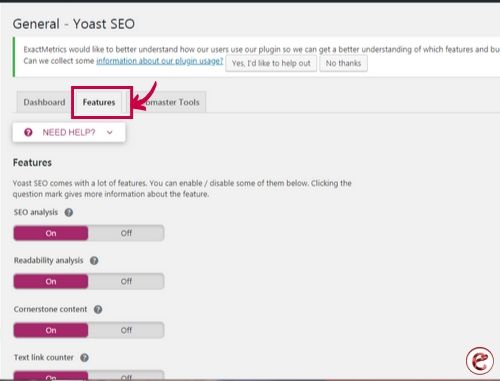
- SEO Analysis: Analyse the content and show the SEO score
- Readability Analysis: Show the readability analysis and score the content
- Cornerstone content: It allows you to mark and filter cornerstone content
- Text link counter: This feature shows you the number of an internal text link to and from the blog.
- XML Sitemaps: It creates an XML sitemap for the website
- Ryte integration: It checks your website weekly and notifies Yoast SEO If your site is deindexed.
- Admin bar menu: It shows the Yoast SEO menu in the WordPress admin toolbar.
- Security: no advanced settings for authors: It hides advanced SEO settings from the authors to improve security.
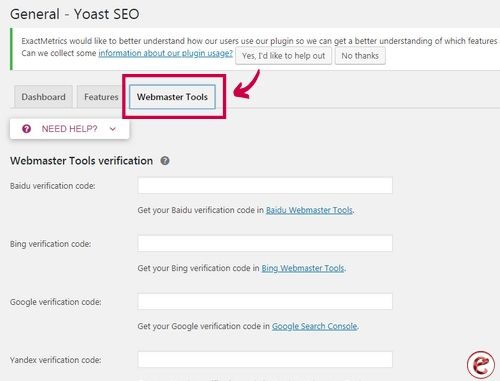
Webmaster Tools
Search engines allow the site owners to add their site using webmaster tools. It is very easy to verify your site. To do that, you need to sign up the webmaster tool for each search engine. After that, you will be asked to add a meta tag to verify your ownership of the website. Add the meta code that you receive from the search engine in the respective field.
2. Search Appearance
Search appearance setting controls the website appears in the search results. It includes several options for the homepage, articles, and taxonomies.
We will go through all of them one by one. Start with the general setting
General:
Use the symbols to separate the words of titles. Dash is the default option if you are unsure about the symbol to choose then keep it as default.
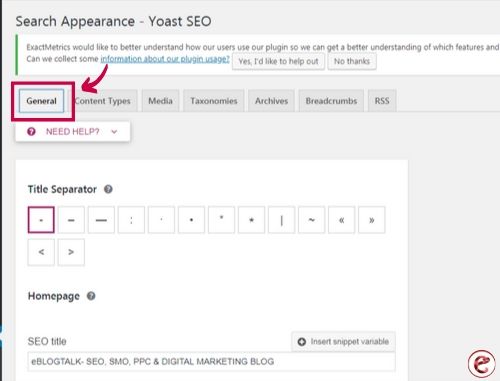
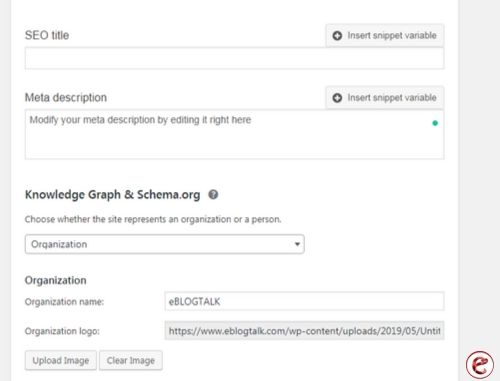
You can also choose the meta title and meta description for your site’s homepage.
After that, you will find the knowledge graph and schema options for your website. You can choose whether your site represents a website or a person. Also, upload the logo and fill the organization name for your business.
Content-Type
Yoast SEO gives you the option to set up the automatic template to use for the title and description of the post and the page. If you forget to add the title and description manually, these options allow the Yoast SEO to use default settings to automatically fill in that options. You are able to set up the data snippet, and whether or not to show SEO meta box in each content type.
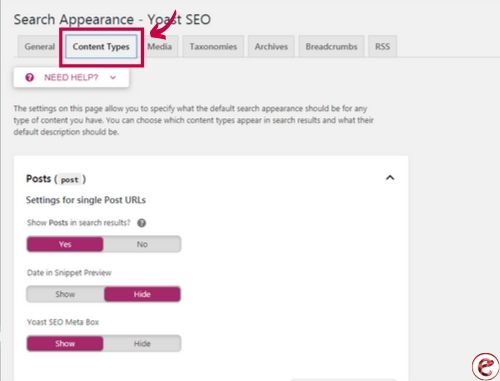
We suggest you leave the meta description field blank. This would allow the Yoast SEO to dynamically generate the description from the first few lines of the content.
Media
WordPress generates the new page for each image which you add in your post. This page only displays the attachment media and this attachment page has no content or text to show the search engines a context. So, such pages are considered low-quality content and have a negative SEO impact.
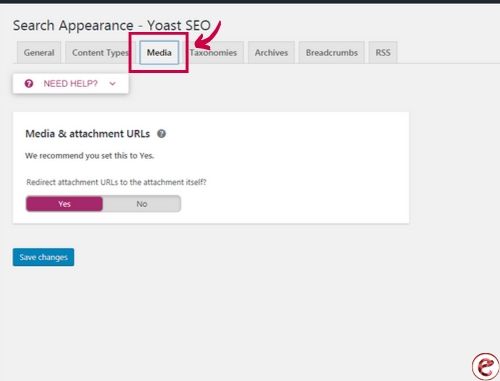
This feature of Yoast SEO helps you to fix that by redirecting the users to the attachment file instead of to the attachment page. By default, it is set as yes, no need to change it.
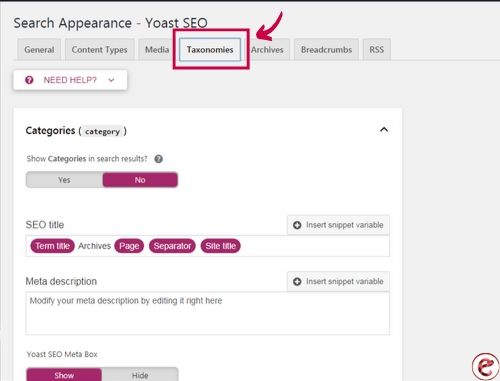
Taxonomies
By taxonomies, you can configure titles and description for categories, tags, and post format archives. Most of the website’s owner uses the default variables. No need to change the variables.
Archives
The archive allows you to control the search appearance option like date, author and 404 pages for the archive page of your website. The default option works for most of the sites. If you run a single author blog, then disable the author archive from the search engines.
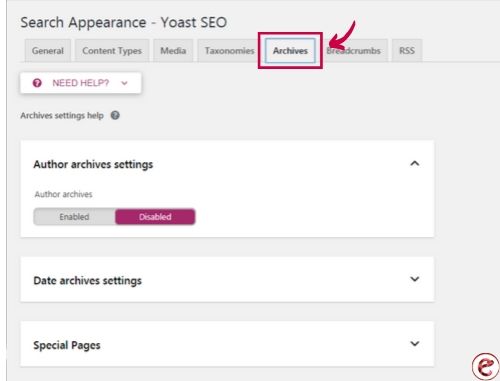
The author archive page is the same as the data archive and blog page on the single author blog. This creates a duplicate content which affects the SEO ranking.
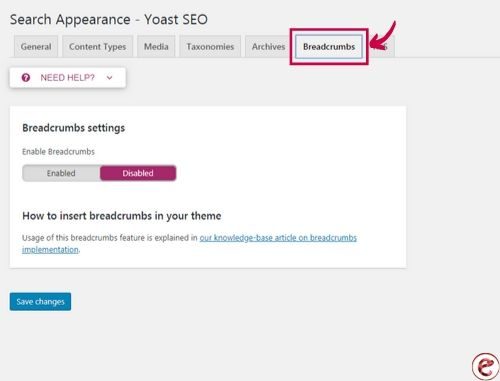
Breadcrumbs
Breadcrumb defines a clear path to the page you are on. It also appears in the search results giving the site extra advantage in the search result. Click on the enable breadcrumbs settings.
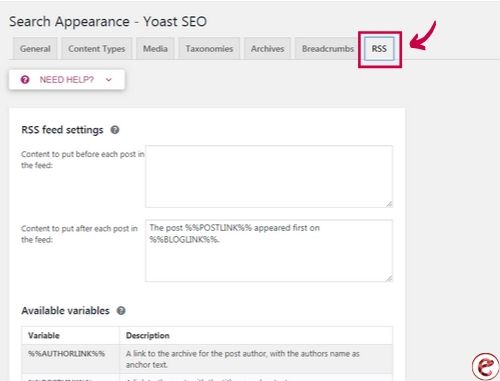
RSS Feed
RSS feed is used to copy the content from the other website. You can add a backlink to your own site for each post in your RSS feed. You can get the backlink from the other website.
3. Search console
This section in Yoast SEO is to allow you to connect your WordPress website to the search console. And by connecting the WordPress site to this section, you allow the Yoast SEO to fetch and display the data of your search console.
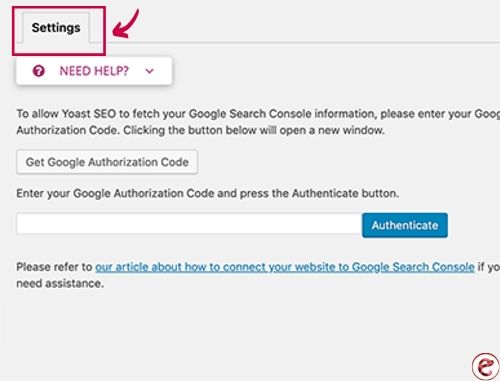
You go to the search console and hit on the “get the verification code”. By clicking on it, you will be redirected to the search console page where you will be asked to give permission. After that, you get the authorization code, copy that code and paste it in the search console section of the Yoast SEO. Click on the authenticate and your search console is verified now.
Search console gives the information on your websites such as the keywords, errors, clicks, and impressions.
4. Social
As we all know that social media is a great platform to promote a website and its products. Through social media sites. You can generate a lot of traffic to your site by promoting your brand.
One of the great features of this plugin is that it integrates your sites with different social media platforms like facebook, twitter, Linkedin and many more. Clicking on the social section will take you to the set up these platforms. Have a look at how to configure each of them step by step.
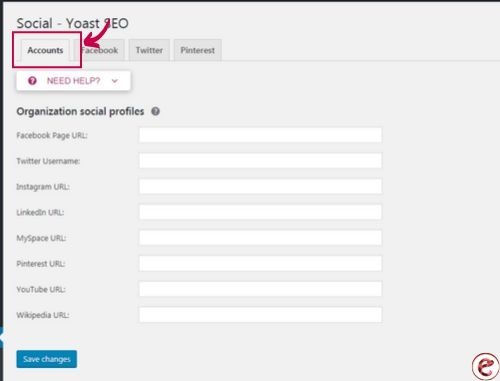
Account
The account is the first tab under the social section for all your account sections. Through this account tab, Yoast SEO plugin tells Google about your social profiles. You only need to add the page URL, and twitter username of your website.
Facebook
Open Graph metadata under the facebook tab must be enabled. It allows Yoast SEO plugin to add facebook open graph metadata in your website. This helps the facebook to pick right thumbnail and information when the post of your website is shared on facebook.
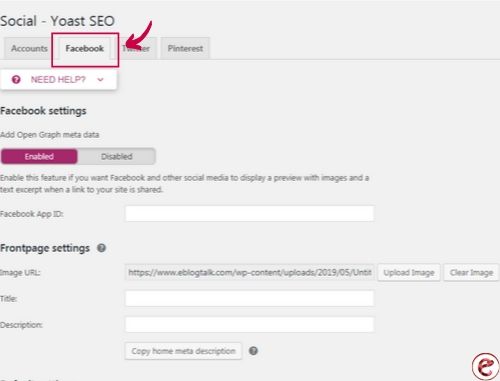
If you have Facebook App ID, paste it in the required field.
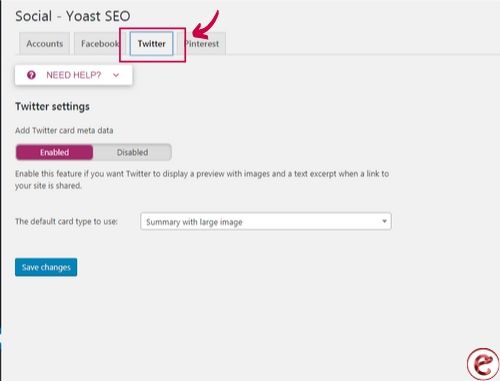
Enable the twitter metadata under the twitter section. There is also a field to choose the card type to use. We recommend using a summary with a large image.
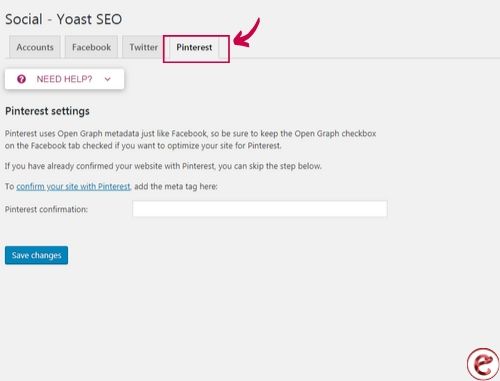
Pinterest
You only need to confirm your site with Pinterest, simply paste the verification code provided by Pinterest. pinterest uses open graph metadata just like facebook. Open Graph metadata box should be checked under facebook settings.
5. Tools
You can use for the advanced task such as robots.txt, and coding. Let’s go to the advanced tools one by one.
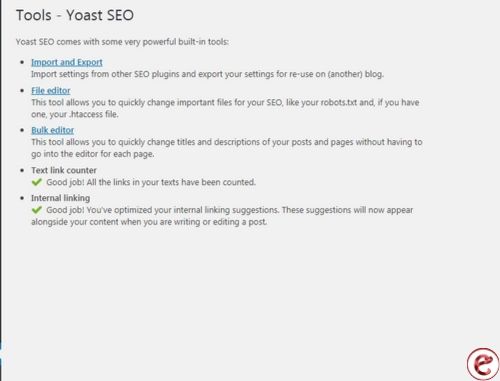
Import and Export
You can transfer the data from one theme or plugin to another.

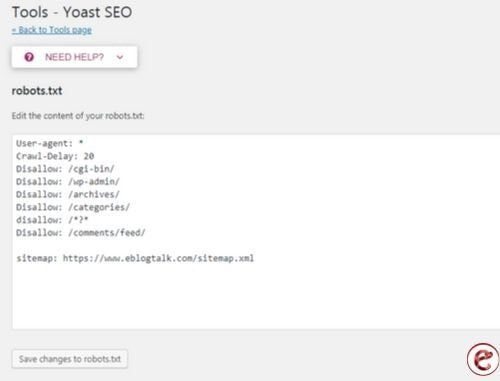
File Editor
Mainly it is used to add code to the website’s .htaccess file and robots.txt file. Yoast SEO plugin for WordPress allows you to edit both the file directly from the WordPress admin.
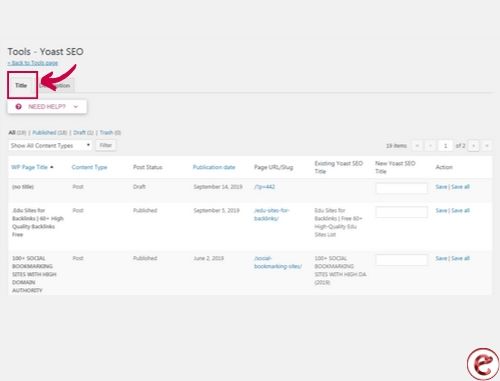
Bulk Editor
It allows you to quickly change the title and description of all your blog posts and pages.
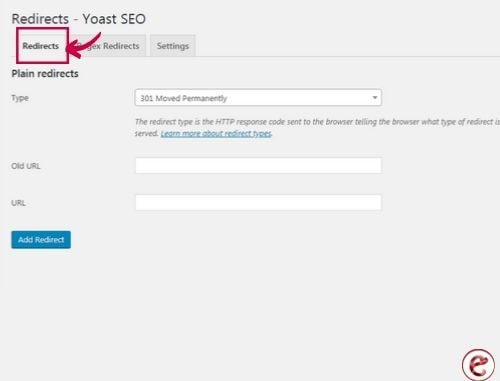
6. Redirects
This section allows you to directly redirect your old URL to the new URL. You can also use to fix the 404 errors.
7. Optimize your posts and pages
If you really want to get the maximum benefit from the Yoast SEO, you need to customize the setting on the posts and pages basis. Have a look, how you can optimize each post with the Yoast SEO plugin. If you edit any post, you will notice that a new Yoast SEO meta box is generated below the post editor.
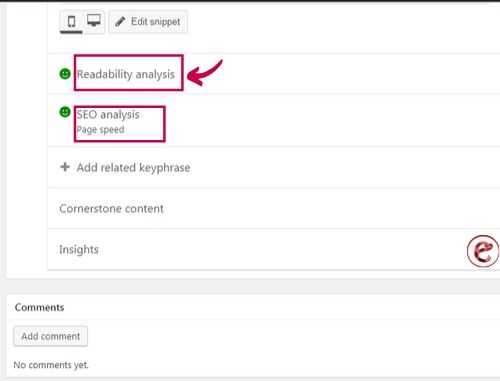
You can start with the focus keyword or keyphrase. This keyword is the main keyword which you think your users will enter in the search box to find the post. Through which the Yoast SEO plugin can analyze the post, how many times the keyword is used in the post or is over-optimized by using the main keyword many times. The Yoast SEO plugin also checks the readability of the post. Sometimes the post title or meta title is not the same. Also, we recommend you to write a custom description because the excerpt generator only picks up a few lines from the first paragraph which might not be the important one.
8. Optimize Taxonomies for SEO
You can also write the meta title and description for the category, tag, and author archive pages. Under the post, there is a category section click on that section and hit the edit link below the category. After that scroll down the bottom, you will see the Yoast SEO meta box. You can change it for the category, tag, and archive.
Learn more:
My response is on my own website
Edu sites for backlinks
Search engine submission sites
Difference between page and post in WordPress
PDF submission sites list
Social bookmarking sites list
IF THE ABOVE CONTENT IS USEFUL FOR YOU, THEN PLEASE SHARE IT!


You actually make it seem so easy with your presentation but I find this topic to be really something which I think I would never understand.
It seems too complicated and extremely broad for me. I’m looking forward for
your next post, I will try to get the hang of it!