After installing WordPress, the first thing that comes to mind is how to add features in the WordPress such as table, contact form, slideshow, etc. WordPress has the solution for this problem, and the solution is called Plugin. Plugins allow you to add new functionality to WordPress. There are many free or paid plugins available for WordPress. In this article, we will get step by step guide on how to install plugin for wordPress.
Note: You can’t install plugins for wordpress.com because it has its limitations. You only install plugins on WordPress.com unless you upgrade to its business plan. But on the other hand, you can install any plugin of your choice on the self hosted wordpress.org website right out of the box.
If you want to switch from wordpress.com to wordpress.org, then read the article on how to properly move from WordPress.com to wordpress.org.
How to install a WordPress Plugin?
To make it easy and simple to learn, we have created a video tutorial on how to install a WordPress plugin that you can watch below.
How to install a WordPress Plugin
The easiest way of installing a WordPress plugin is to use the plugin search in the WordPress admin. The downside of this option is that paid plugins are not listed in the WordPress plugin directory and it is limited to only free plugins.
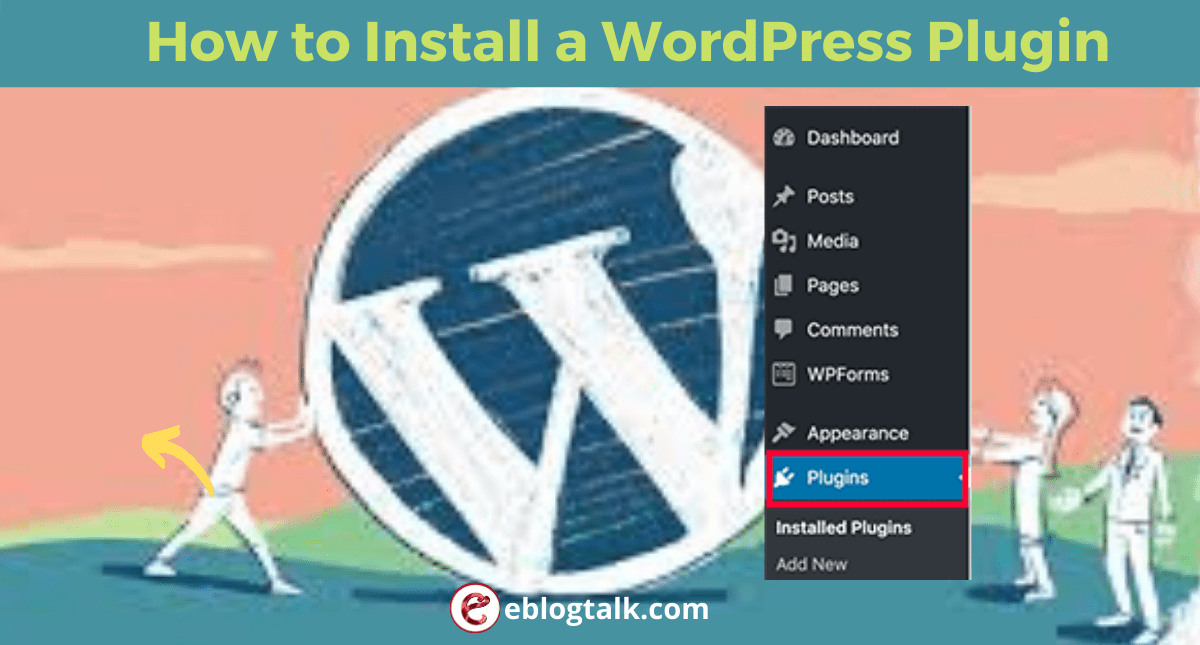
First thing you have to do is go to your WordPress admin area and click on Plugins >> Add New.
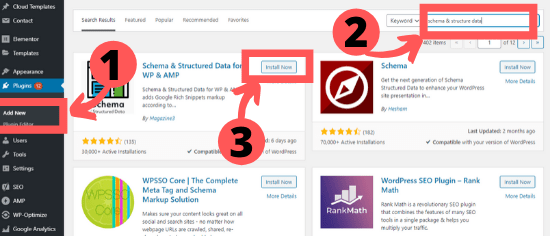
Type the name and functionality on the search bar to find the plugin you are looking for.
Upon typing the plugin name, you will see a bunch of listings of the related functionality.
WordPress will download and install that plugin for you. After this, you will see the success message with a link to activate the plugin or return to the plugin installer.
You can choose the plugin that is best for you. If you have no idea about the plugin which is best for you then have a look on the rating and choose the best one. Now, click on the install button now.
The selected WordPress plugin is installed. Now, you will see the success message with a link to activate the plugin or return to the plugin installer.
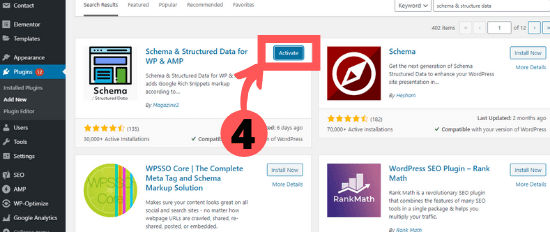
A WordPress plugin will not work unless you activate it. So, activate the plugin on your WordPress website. You have successfully installed the WordPress plugin. The next is to configure the plugin settings.
Install a plugin through the WordPress Admin Plugin Upload
Paid WordPress plugins are not available in the WordPress plugin directory. That’s why WordPress has another method to install paid plugins. Now, we will show you the steps on how to install WordPress plugins using the upload option in the admin area. Firstly, you need to download the plugin from the particular plugin website. And the downloaded file is in the Zip file. Now, you will have to go to the WordPress admin area and visit Plugins » Add New page.

After that click on the upload button on the top of the page. And this will bring you to the plugin upload page. Tab on the choose file button and select the plugin file you downloaded earlier to your computer.
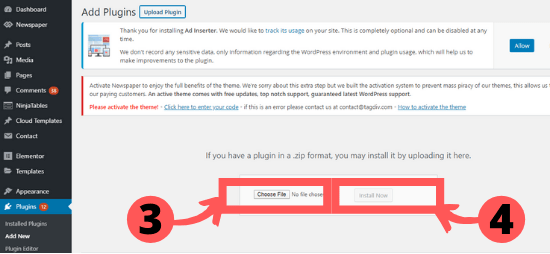
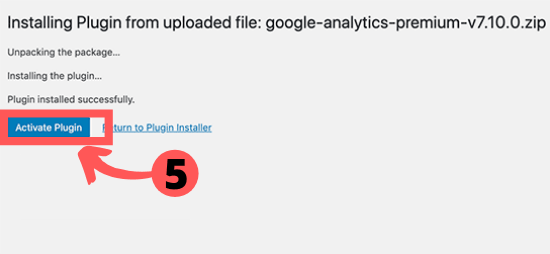
After attachment of the selected file, click on the install button. WordPress now uploads that plugin zip file and install it. You will see the success message after the installation is completed.
Once installed, click on the activate plugin link to start the plugin. Now, configure the settings to fit your needs.
Manually install a WordPress Plugin using FTP
In some cases, the WordPress hosting provider may have file restrictions that could limit your ability to install a plugin from the admin area. In this type of situation, FTP is the best choice to transfer the plugin.
First you will have to download the source file of plugin. Next, you have to extract the zip file on your desktop.
Create a new folder with the same name after extracting the plugin zip file. Now, upload that extracted plugin file to the website using a FTP client.
You would need to access your web host by using the FTP manager. Open the FTP client and connect to the website using the login credentials provided by the web host. Once connected, you only need to access the path /wp-content/plugins/.
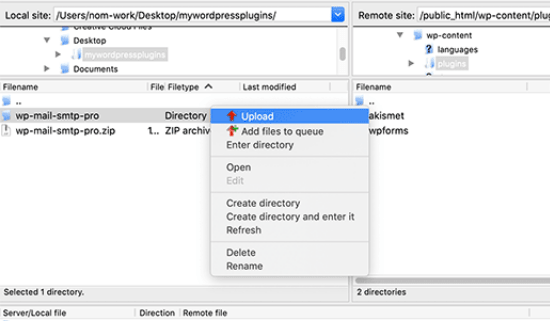
Next, upload the extracted zip file to the /wp-content/plugins/ folder on your web server.
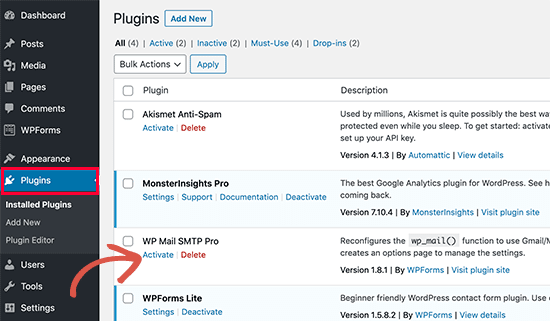
After uploading the plugin zip files, you have to visit the WordPress admin area and click on the Plugins link in the admin menu. Now, you will see your plugin installed successfully on the plugins page.
Now, click on the Activate link to start the plugin. Upon activating, you need to configure the settings of that plugin.
If you like this article share it with your friends and on the social media such as Facebook, Twitter and linkedIn.